
How to set up a new Google Business Profile account
Gavin Reynoldson July 8, 2025
If you serve brick-and-mortar businesses, you probably find yourself going through the process of starting a new Google My Business account from scratch.
Step 1: Set up a verified Google Business Profile
Note: There are two ways to verify your Google Business Profile. If you have a physical business location, you will be required to record a business video. If you do not have a physical business location, you will receive an authentication code for your phone number. In either case, make sure your phone is nearby and ready.
1. First, sign in to the Google Account you will use to manage this business account. Visit the Google Business Profile site and click “Manage now”.

2. Since your business is new to Google, click “Add your business to Google”.

3. Next, key in your business name and select a business category to get started. Click “Next” to proceed.

4. Click “Yes”, if you have a physical location or vice versa. Then, click “Next” to proceed.
5. Next, key in your business address and click “Next”.

6. If you provide deliveries, this is the time to click “Yes” > “Next” or vice versa.

7. (Optional) Then, add the area(s) where you provide your service. You can add more than one area or change it later.

8. Enter either your business phone number and/or website link (optional but recommended) and click “Next”.

9. (Verification Method 1) Now, you will be required to enter your phone number. If you have a physical business location, you will be required to record a business video. Click “Next” to reveal Google’s requirements and QR code to link to your mobile device for the video recording.

10. (Verification Method 2) If your business does not have a physical location, you’ll be required to verify it by entering an authentication code sent via email or phone.
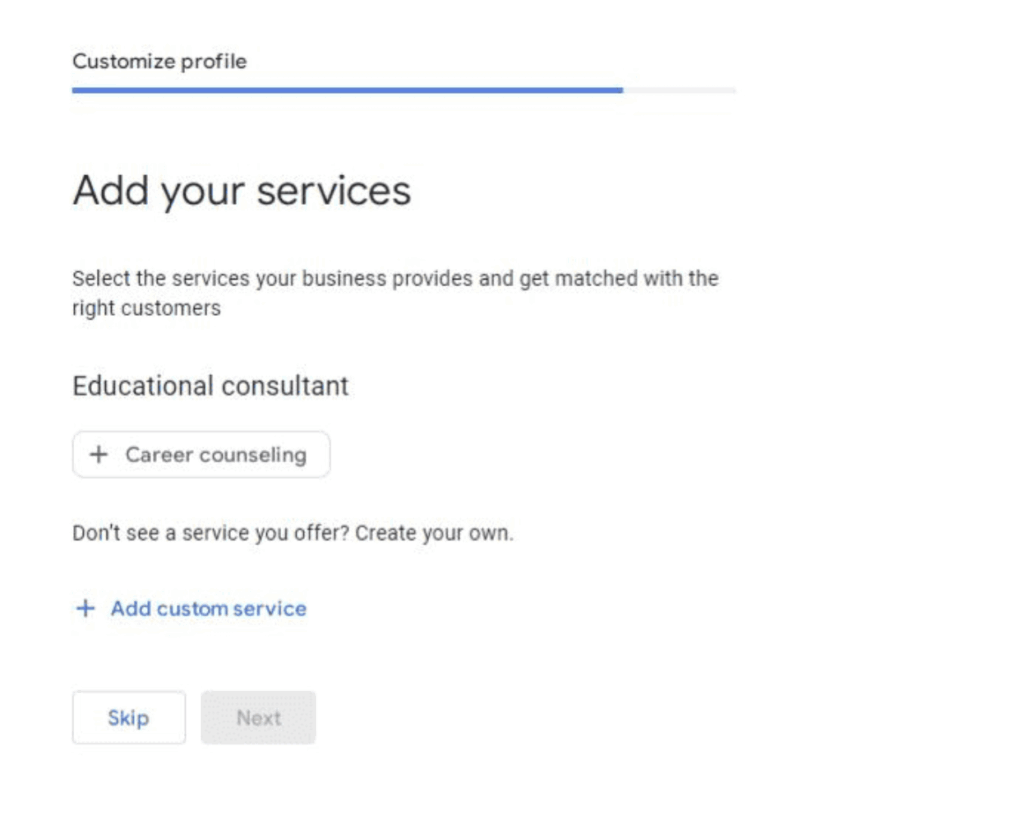
11. By now, you can add or customise the service(s) you provide.
12. Then, add your business hours.

13. Customise your profile by adding a maximum of 750 characters about your business or a description.

14. (Recommended) Continue to add your business photos, if you have any.

15. Next, you will be prompted to advertise your Google Business Profile using Google Ads.

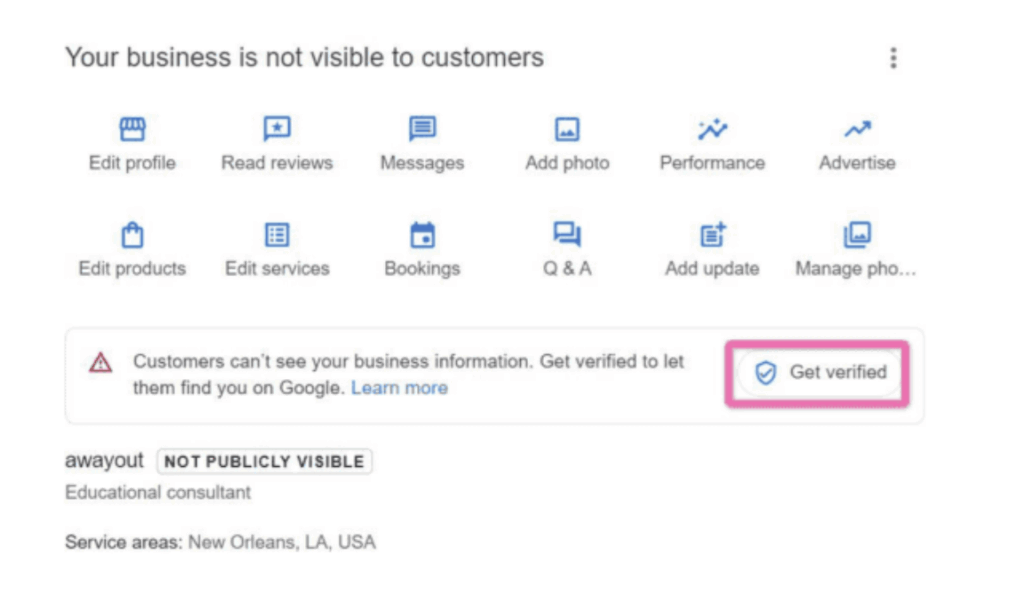
16. Once the business details are all set up, you can view your Google Business Profile on your Google page to edit your profile and oversee your profile performance after the verification is approved.

Your Google Business Profile will not be visible until it is successfully verified.
Note: If you’re setting up a Google Business Profile account for a client, we recommend you do this through your agency’s Google Business Profile Organisation account.
17. Log into your organisation dashboard. Ensure that you are on the right page labelled as “Google Business Profile Manager” and not “Google Account”.
18. Click on the “Businesses” tab on the left.
19. Make sure you’ve selected the right location group for this business and click on “Add Business” > “Add a single business”.

Google will give you two options:
If the business doesn’t have a Google Business Profile account (this will be the case for most people), create a new business.

If the business you want to manage already has a Google Business Profile account (this won’t be the case for most people), you can claim it by searching for it and selecting it from the dropdown.

20. Next, type the name of the business and business category and hit “Next”.

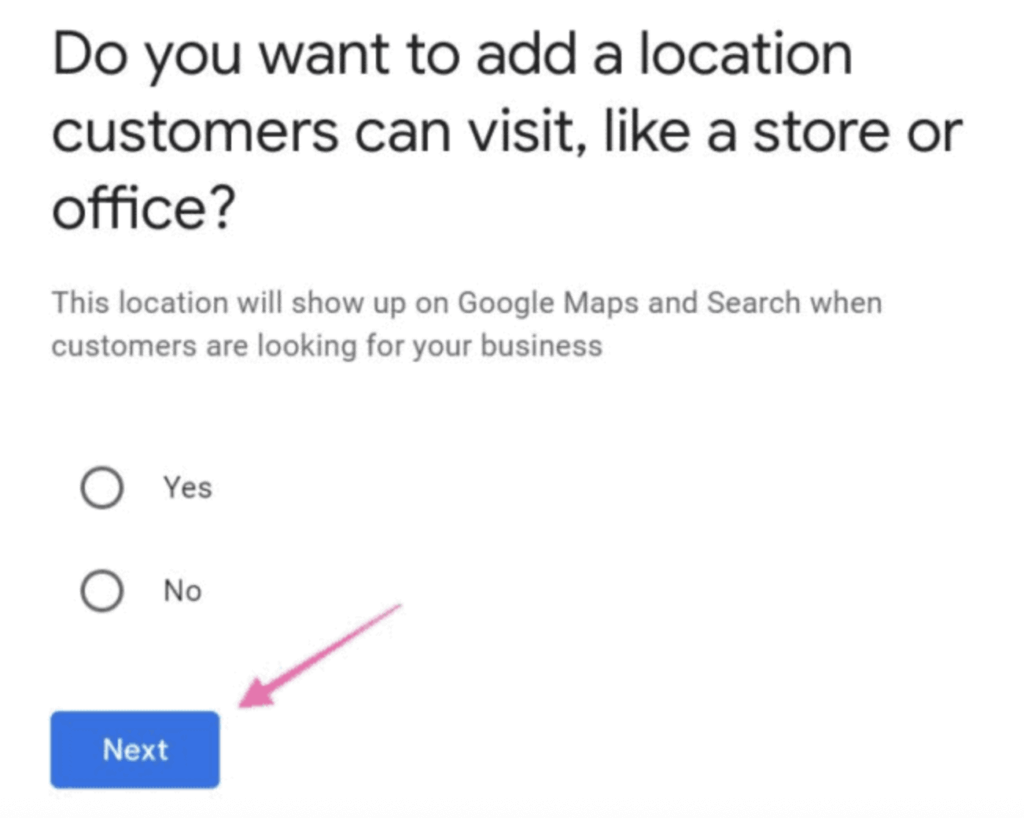
21. Next, you will need to choose whether to add a location to this business or not:
If you have a physical location where your potential customers can go (e.g. store, office, etc), select “Yes”.

22. Next, you’ll need to add the full address of this location and then choose the appropriate business already located on Google Maps.

[Optional] If you also provide services or products outside of this physical location (e.g. you do deliveries or remote visits), you can add a service area by selecting “None of these”. Click “Yes” in the following pop-up as seen below and enter the address.
[Optional] If you don’t have a physical location where your customers can go, but instead you service customers in an area (e.g., wedding photographer, locksmith, painter, etc.), you’ll select “No”.

Finally, you’ll see a success screen next.

Important: For your customers to publicly view your Google Business Profile, Google will need to verify this business is real by recording a business video.
Step 2: Verifying your business
1. Go to your Google Business Profile dashboard and click “Get Verified”.
2. Select “Business video” and then click “Next”.

3. Before recording, you will be recommended to follow a few criteria that are required for the business video recording and tips such as the below. Take time to plan before you click “Start recording” :


4. Next, you will be prompted to scan a QR code using your mobile phone. Make sure to sign in using your business email account:

Note: The video recording should at least be more than 30 seconds and no more than 5 minutes. The business video recording is preferred to be at approximately 1 to 2 minutes.
After uploading the video on your mobile phone, your Google Business Profile will be reviewed, which will take up to 5 business days. Once it is verified, you will be able to manage all of your settings in the Google Business Profile.
[Optional] You can delete your video at any time. If you cancel a video upload, both you and Google lose access to the video:
5. On your mobile device, go to your Business Profile.
6. At the top right, tap “More” and then “Advanced settings”.
7. Tap “Video uploads” and then “Delete videos”.