
How to Build an Online Store
Hi guys, I’m Gavin from GenUp Digital. And in this video, I’m going to show you how to build an online store quickly and easily for your online business.
Step 1: Choose a website template
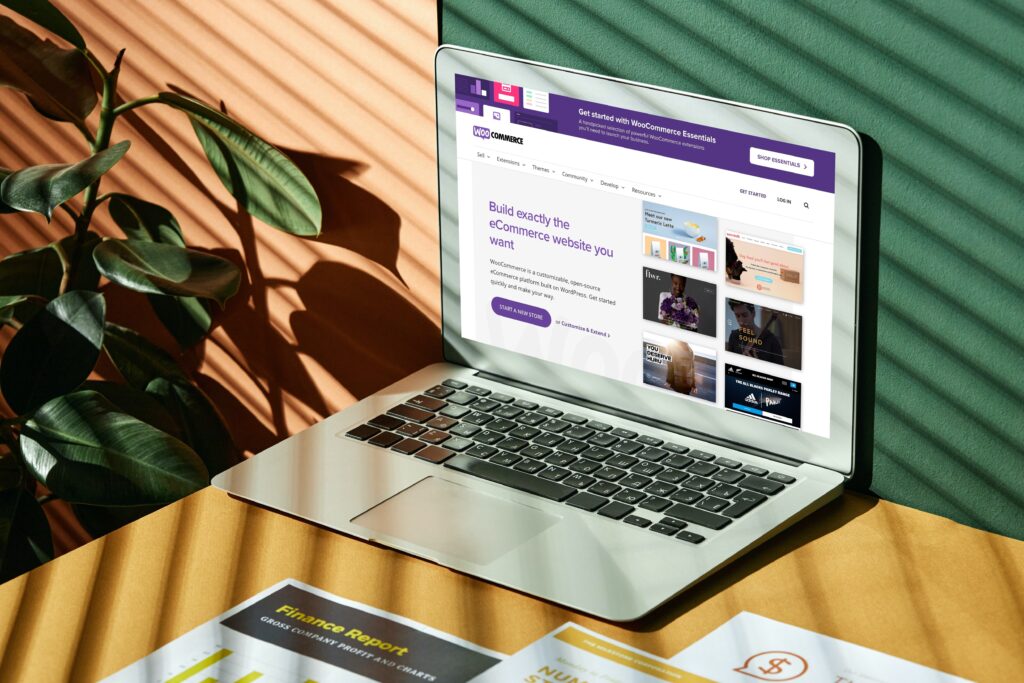
So the first thing you’re going to need to do is head over to the link that’s in the bottom of the video at genupdigital.com forward slash websites forward slash website builder forward slash templates, so that you can choose your online store template.

There are over 100 templates to choose from some of those templates that already set up for you to use as an e-commerce store or an online store, but you can also set up the online store on some of our other templates.
So let me just quickly show you how to do that. If you visit this link and scroll down as you visit the link, which says store, you can see some of the predesigned store templates.
We already have. The great thing about this is that you really just need to add your own content, add your products, and you are good to go, but you may want to design the store yourself.
In which case, if you click on all templates, you can scroll down and look through the list of all of the templates that we have choose one, which is relevant for your business and sign up for that.
So for example, you might decide that you have an accounting business and that you want to add an online store to your accountancy so that you can sell products or take subscription payments online through your accountancy store.
And that’s just an example. It might be that you have a totally different business, and you just want to add an online store to your business via one of these templates.
So you just click on the start, build button, enter your details, and then click on the link in your email.
Just to show the example of the two here, we’ve got an example of the accounting website. Now this isn’t set up for an online store, but you can easily add one on the left-hand side.
Step 2: Add the online store
You’ve got an e-commerce option here. And if we click on that, you can click add an online. So store hit the start for free button, and then the store will be added to your website.
It will be added as a shop tab, so an additional URL page, and it will be added at the top of the site here.
And then you can go through the process that I’m about to take you through on the next website to see how you actually add your content.
So this is a, this is a template without a store, but you can add one, but let’s say you’ve picked an online store that’s already been created.
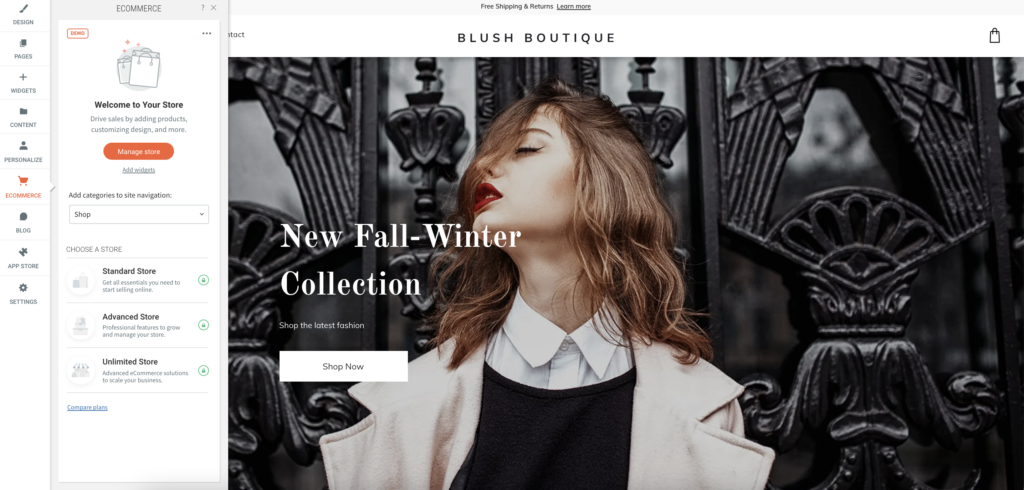
So in this example, I’ve picked the fashion online store and that’s the one that we have here. So this is a fantastic looking fashion, online store website.
The website is already built. It’s good to go. So you can see this is the homepage header, the footer it’s because of images and content.
The menu on this store is up here on the left-hand side. So you can see we’ve got contact page, visit us lookbook and about page.
And then the shop page. You can add more pages if you want. That’s not a problem. And you can watch one of the other videos that I have on how to build out your store to learn how to do that.
The shop page is where the online store is actually built on this particular platform. And here there’s just two categories.
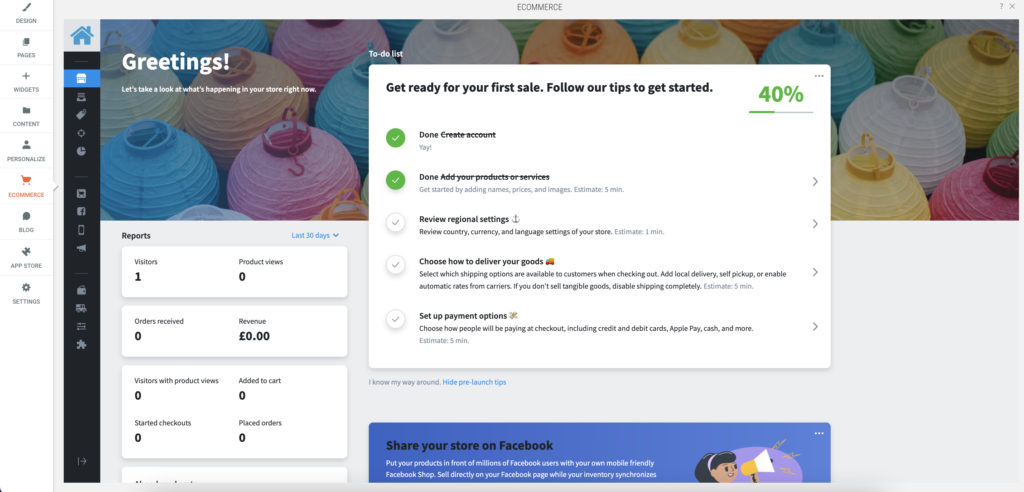
Setups. We’ve got work and evening, but if you want to start adding content to the shop, then you just need to head over to the menu on the left-hand side and click on the e-commerce tab.
And then in this example, because the store has been added, we’re going to click on manage store and you can see we’ve got to do lists.
Now you can ignore the, to do list if you want, and just go straight into the store and start adding content and playing around with stuff.
Step 3: Add your products
But if it’s your first time using this platform, using our website builder, then you’re going to probably want to go through these steps one by one now, because the store has already been populated with content.
These first two steps say they’ve been completed, but you might want to click back through them and have a look anyway.
So the first option is to actually create the account. Well that’s been done for you. The next option is to add your products and services.
So lots of fake products have been added to this online store, but we can click on it and have a look anyway.
So here, this takes us to the product page and you can see we’ve got lots of different fashion items, which have been added already to the product page.
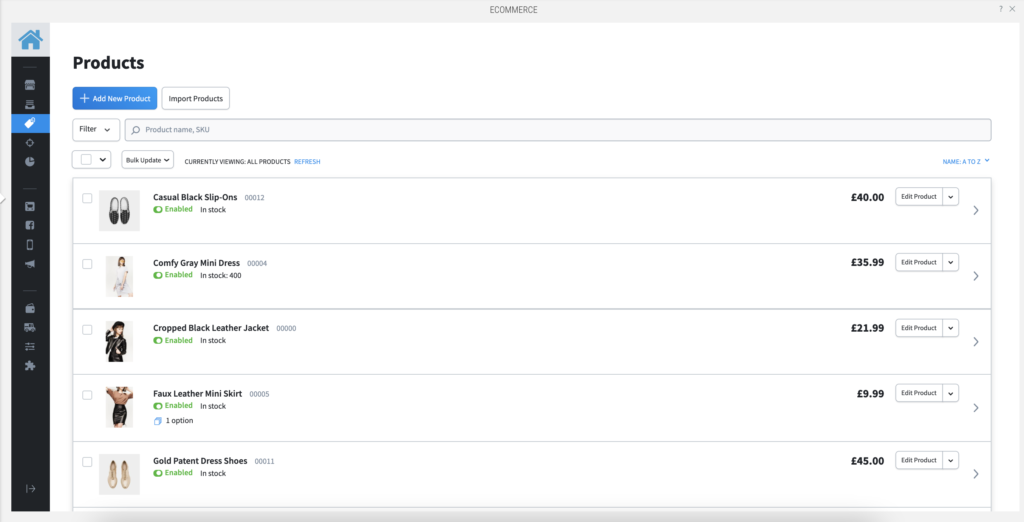
Now you can delete these or you can edit them, whatever works for you, and you can also add a new product.
So, uh, if this is going to be your first online store, you’re probably going to want to go through these one by one and then delete, delete the products.
So you can do this here. You can select all of them and then enable disable or delete selected. It’s just untick that you can also, and this is a really fantastic, um, option.
If you’ve got a lot of products to install, you can import your products. So you’ll need to put your products into a spreadsheet, into a CSV file.
And, um, I will provide a link with information as to how you do that in the bottom of the video, but you can create a spreadsheet with all of your products already set up and then import that into the website.
And that will automatically add all of your products with the images, the descriptions, the titles, and the pricing for each product.
So you won’t have to do it manually, but if you’re not going to do that and you decide to add it manually, you can head over here to the product button on the left-hand side and click on add product or add new product.
And this is what the page looks like here. So you can upload your images, give the product name an SKU.
If you need to wait product description at the product categories here, you can select as to whether you want to display the product on the front page of your website, website or not.
And then you’ve got your price, the compare price, if you want to compare it to what the products and then some special features is if we could poke with discount, uh, enable pay what you want pricing for the customer, and you can also set up subscription payments.
So you don’t want to take a one-time payment, but you want to offer your customer subscription payments. That’s also available as an option, product availability as well.
So it may be that you have the product, but you don’t have in stock or for whatever reason you’re not selling at the moment.
So you can just turn this off. So the product is not enabled. And if you need to, you can also manage stock, um, to ensure your stock levels don’t run out, et cetera.
So once you’ve added your product, you’ve also got a load of So you can add, add attributes to the product, you can upload files for the product.
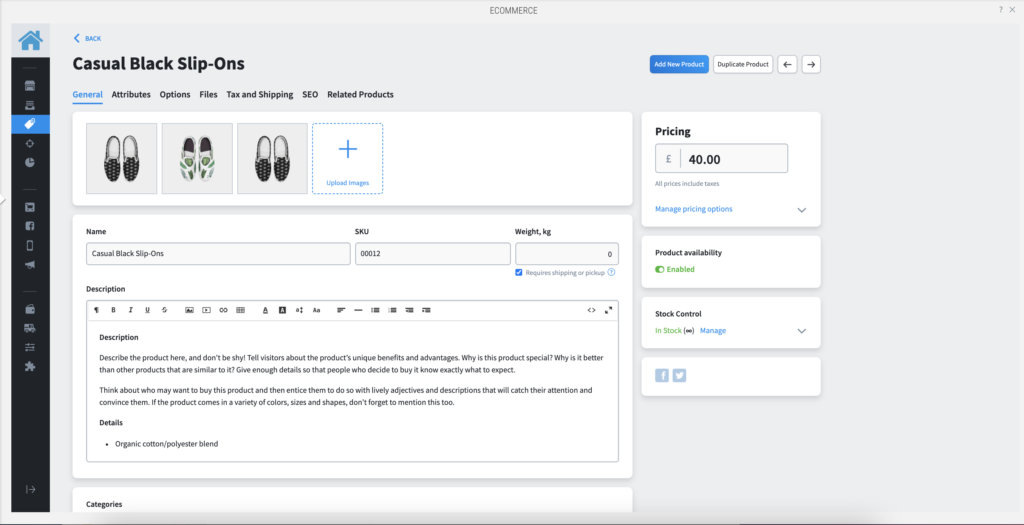
So if a customer needs a particular document or they’re downloading a particular document as part of the purchase, this is where you would upload the files.
You can set up tax and shipping rates for the products. You can SEO the products and you can add related products.
So when you have a product that’s being sold, you might want to upsell or cross sell a particular product, um, with the product the customer is purchasing, and you would add those related products here.
So they show up at the same time, SEO, this tabs really important. So SEO is search engine optimization, and this refers to how your product appears in Google and when people are searching for your product on search engines.
And so it allows you to edit the page title and the meta-description, and it gives you examples of how that would look on a search engine.
So for example, casual black slip-ons, and this is how it would appear in search. So you can change this so that it displays the correct product description and title for what people might be searching for online.
And that increases the chances of your product appearing online when people are searching for it. So that’s how you add your products.
Really, really simple to add your products on the left side here of the online store, you’ve got a load of load of options to you.
So, first of all, we’ve got the dashboard, which is where we started off. And then if we hover over here, we’ve got my sales.
So we can look at orders, current orders, abandoned carts, who your customers are, any subscriptions. If you set up subscription products or you can edit edit orders.
So orders allows you to look at your, your current orders, abandoned carts. This is a really, really useful tool. So if somebody is going through the process of purchasing a product in your store, they add things to the cart and then they abandoned the cart and they don’t pay.
What you can do is you can set it up so that it sends those, those people emails and say, Hey, don’t forget to buy this thing, whatever it was in the cart.
And it sends them reminders, which increases the likelihood of them purchasing the product at later date, uh, you’ve got your catalog of products.
You’ve got a marketing tool, so we can look at Google ads. We can include Facebook ads. You can set up coupons and discounts, newsletters, and automated emails.
You can run reports. You can look at your overall, um, purchases. You can connect your online store to Facebook and then sell your products on Facebook.
There’s mobile optimization. So you can get the app so you can manage your store on the app and on different devices.
And then there are other channels that you can sell on as well. So you can sell on Instagram, Facebook messenger, Google shopping, square, eBay, and Amazon.
So you can connect to your Instagram account and so on. So this is a really, really, uh, fantastic all in one option for setting up an e-commerce store, you can collect payments through different payment providers, payment processes.
So we’ve got Stripe square PayPal, you’ve got manual payment options, and there’s some additional options that you can set up here as well.
And then you can sort out shipping, you can connect with different shipping providers, local delivery, or self pickup. And then you’ve got a whole range of general options, which you can work through as well.
So this online store is a good to go platform. All you need to do is choose the e-commerce store online store template that suits your particular business.
And within about an hour, you can add your products and launch your store on line. It’s really, really quick and easy to use.
The one thing you’re probably going to want to do is edit the content of the website first. And you can do that really simply using the drag and drop features of the website.
So if you want to change text hover over the box, click on the box, you get your usual editing sections and you can make changes.
If you want to change an image, click on an image and you can replace the image. You can upload your images.
Uh, you may want to upload your own images, or you might want to use stock images. Uh, if you’re using stock images, our website builder comes with, uh, hundreds of already stored stock images.
You can just search through here, or you can use the search, uh, let’s try t-shirts and here, you know, t-shirts, you can choose.
And if you want to add your own pages, you can add new pages here. You can add additional content. And if you want to add additional features to the website, then come over here to widgets.
And we’ve got all the usual websites, widgets you would get with a website builder. So you can add content. You can add images, you can add video, you can add a map.
You can add new structural changes to the website, media, all of your business details, uh, easy peasy to add content to the website, not a problem.
And then we also have your blog. And then if you want even more features, we have apps, which we, you can install on the website just by clicking, which allows you to create your own logo or improve your search in Google, or assist you with Google ads, ad GDPR terms and conditions, lots and lots of options for apps as well.
Step 4: Launch your online store
So if you’re looking to build an online store or e-commerce store really quickly, really beautiful templates and get your, your shop online straight away, then have a look at the general digital website, builder templates.
It’s really quick and easy to launch your online store and add content and get started straight away. All of the websites come with a free domain name, but you can also add a premium domain name as well for your business.
They come with SSL a standard. So you’ll always get the security tick in the padlock in the top left-hand corner of the domain name.
So everything is served securely and hosting is included as well. So this is a really fantastic all in one package for you to build your online store and get started straight away, click on the link in the text below, choose your template and get started and get in touch.

Responses