
How to Create a Blog
Hi, I’m Gavin from GenUp Digital. And in this video, I’m going to show you how to add a blog to your GenUp digital website builder.
Step 1: Choose a website template
So the first thing that you’re going to need to do is head over to genupdigital.com, search for website builder, and then choose yourself a website template.
There are over 100 to choose from. Some of them come with blogs. Some of them come with e-commerce stores and other features.
But in this one, I’m going to show you how to add a blog or edit the existing blog that you already have on your website.
So once you’ve signed up for a free account, there’s a 30 day free trial log in via your email to the dashboard.
This is where you’ll initially be taken. And you can see, you can edit your website. You can review these websites, statistics, and if you have any questions, you can click on the little question, mark icon in the top right-hand side.
Let me just show you this. It will take you to the help center, where there is information about how to use the website builder with every question you could ever imagine being answered for you, but let’s get back to the website builder.
So the first thing you’re going to do is click on the edit button and open up the website builder. So in this example, I’ve picked a strategy and consulting template, and the reason I’ve done that is because this one doesn’t actually come with a blog already created.
So it’s a nice, simple website, very simple layout, and it’s got three pages. You can see home services and contact, but let’s add a blog page to this website as well.
Step 2: Add a blog
So on the left-hand side, when you scroll down, you’ll see there’s an option for blog here. One of the reasons that you might want to add a blog is because you want to produce regular content for your website, so that you can provide education and information for your existing customers, but so that you can also drive additional traffic to your website and to enhance your SEO, your search engine optimization, which is how you appear in search engines, such as Google and being when people look for companies like yours on the internet or content they’re searching for which your website may have created.
So let’s head over to blog And click add blog . So the website builders is going to take you through a setup and give you instructions on what to do with the blog and how to add content.
It’s a very simple process, and I’m going to take you through it now. So getting started with your blog is easy.
Step 3: Create new blog posts
You’ll see the structure in layout mode and enjoy content flexibility in post mode, layout mode, smoke, design, smart design. In this mode, you set the structure once for all posts, supports SEO and makes your blog consistent post mode for content flexibility.
This is where you go to write your posts. You can edit posts, just like you edit pages and add any widgets you want.
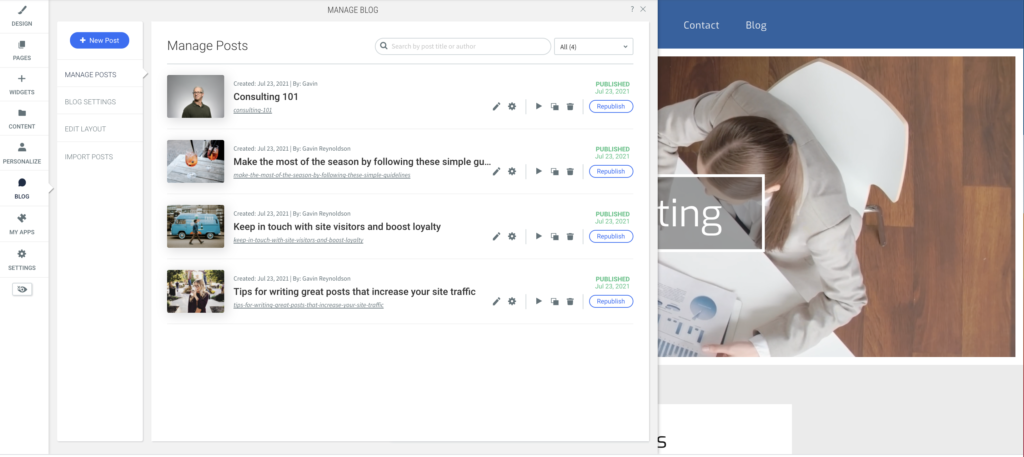
So let’s create our first post. So this is the manage blog area, and you can see that we’ve got a number of different, uh, settings that you can choose from.
And there were three blog posts they’ve already been created. Also on the right-hand side here, if you look across the navigation menu, you’ll see that an additional page has been created.
And that’s the block page. So a blog has now been added to this website, so you don’t have to worry about adding the blog to the navigation menu at the top here.
Now these three blog posts are just Stock Stock posts or template posts. So you can see how, how they look.
You can see the layout of these, but probably going to want to delete them unless you want this fake content on your website.
On the left-hand Side, in the navigation menu here, you’ve got 1, 2, 3, 4, or five options. So the first option is you can create a new post.
So every time you decide to write a post, this is where you’re going to come. You can manage your existing posts and you can see here, there’s a little, a little arrow, which means we’re in the manage existing post section.
Step 4: Edit blog settings
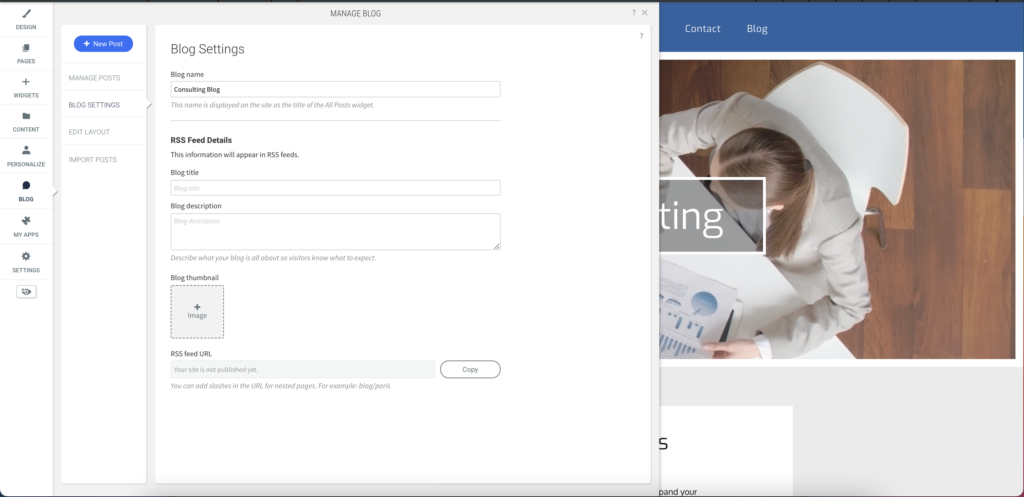
We can click on blog settings and add details to block settings. So for example, we might want to give our blogger name.
This name is displayed on the site as the title of the all posts widget. So let’s call it consulting blog.
And then we’ve got information for RSS feeds. So the blog title and the blog description and the blog thumbnail RSS feeds are feeds, which provide people with access to information online, such as blog posts and news posts and news outlets.
And if someone were to sign up to your blog on an RSS feed, they’d need to receive certain information such as the blog title and the description and the thumbnail.
So if you intend to make your blog available in a specific RSS feed, then you’re going to need to add the information here.
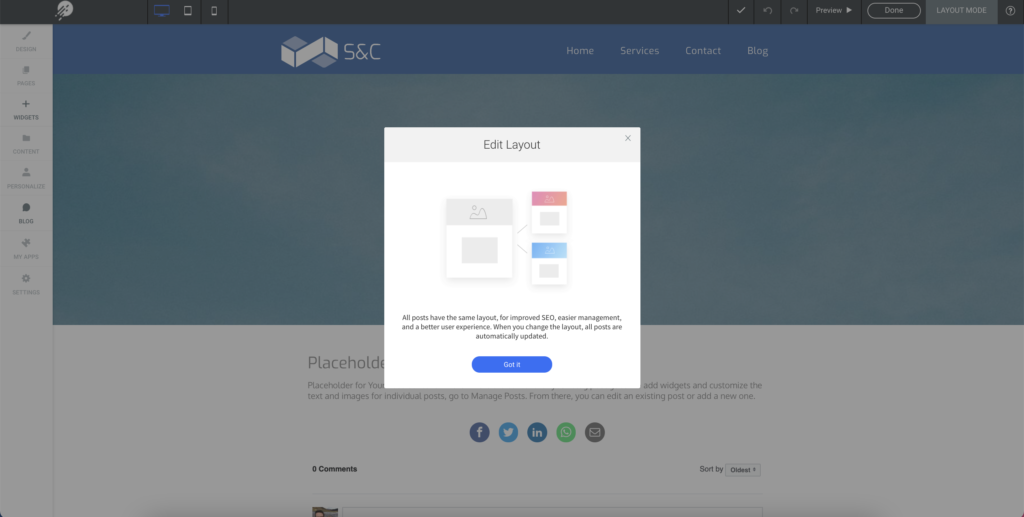
So your blog title, the description and the image of your blog and the RSS feed URL, uh, we’ve then got edit layout.
So this is actually where we do some of the heavy lifting for how the blog log actually looks. So here, we’ve got some instructions, edit layout, all posts have the same layout for improved SEO, easier management, and a better user experience.
When you change the layout, all posts are automatically updated. Got it. Okay. So this is your main blog page. We’ve got a header area here.
We can put a title, we’ve got the post author and the post publish date. So they’re automatically set post title placeholder for your post subtitle and then comments.
So you can see say the pitch is connected. My Facebook account was in my profile picture their social media icons.
And then these are the existing posts that have already been created. Let’s just have active blog. The other thing you can do is input posts.
So you can input up to 300 posts. If you’ve, um, got posts on another RSS feed or elsewhere, then you can import them as opposed to having to rewrite every post.
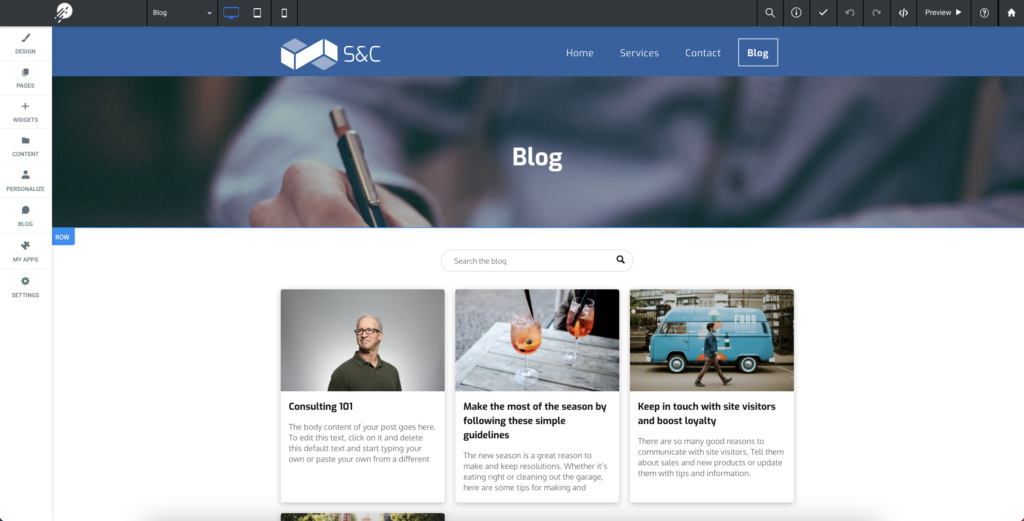
Again, I’m just gonna close this and take you to the actual blog page. So this is how the blog page looks at the moment.
So if you head over to blog and click on blog, we can see that we’ve got the blog page. We’ve got a background image in the header here.
We can search the blog and you’ve got the three existing blog posts. Now you might want to change this image on the head of hair, which you can do.
If you click, just click on the image, anywhere in the box and scroll down at the moment. This is the image that’s been chosen.
But if we click on replace, You can either upload Your own images, or you can search through the images that are already on the website, or you can search the database.
We have hundreds and hundreds of stock images available for free, and you can search the database for images So I’ve just typed in holiday.
And if we’ve got it to random holiday pictures, obviously you might want to choose something a little bit more specific, something related to consulting and here we’ve got some consulting images, so we could change it to this one.
For example, we press Select, okay. And the image has changed. You can also edit the text by clicking on the box and using the usual editing features.
Plus all of the usual options up here to make changes to the blog title. You can add additional texts in as well.
So this is your blog area. We can click and edit this area here, and we’ve got two options. We can edit content and we can edit design.
So we start with content. We can decide how the content is filtered. We can change the text on the buttons.
We can choose to display certain information or hide that information, or we can change the design. If we click on design, we’ve got options for changing the layout, posts, frames, animations, and the spacing between each blog post.
If we have a look at layout at the moment, we’ve got three blog posts next to each other, we click on this icon.
We could change it to two, or we can change this position. Or we could just have one blog post that people scroll through.
We can choose the number of visible posts on display. So do we have one on display or 10 or more three per row?
How many teaser lines of text here and the space between, so there’s lots and lots of options for changing the style and the layout of the actual blog page itself.
So what about actual individual blogs? So if we go back to blog and go to manage posts, let’s say we want to edit one of these existing posts.
So we’ve got a few options here. We can click on the edit icon, click on the post settings, preview the post, duplicate the post, or delete the post.
So let’s start by editing the post. So when you click to edit, the post is actually takes you to the existing blog post and it says click anywhere to edit this post.
So if we click on the screen, we can change the background image in the same way we did before just click, replace and upload a new image, or we can change the text.
You can click and we can edit the text within the post. Again, we have the usual editing tools to make changes.
Um, on the top right here, you see, we can click done or republish this post with your latest changes. So I’m going to click done, and I’m going to come back to the managed posts section.
So now I’m looking at the post settings. We come back to this screen here, instead of clicking on edit. I want to play around with the settings for this particular post.
So I’m going to click on post settings and we can see that the post has been published. And the next thing we can see is the URL for the post.
So when someone’s searching online, how do they actually find that blog post? And here at the moment, we’ve got a random website URL because this isn’t a live website.
So it might be for example, consulting.com forward slash and then whatever you want to put in here for the name of the post.
So you can change this and edit this text so that the string for the URL matches with whatever you want the post to be called.
You can change the date of publication, and then you can provide information about the post, the post title, the post author, the main image for the post.
And then this is really, really important. This is probably other than having written the post itself written the blog article itself.
The post meta data is probably one of the most important things that you can write for the blog post. And so what we’ve got here is a thumbnail and then oats text.
So this is alternative text, which describes the image. It’s really important that you write something in here. Some descriptive words of what the image looks like, because that helps with SEO and or should be related to the post itself.
And then we’ve got a post description and some post tags. So What you write in here is going to help your blog posts to be found online when people are searching for them.
Uh, okay. So that’s How to edit an existing post, but let’s say we want to add a new post. So we’re going to go up here and we’ll click add post, and let’s put, let’s say we’re going to create a post called consulting 1 0 1 and add a new author.
Probably don’t want Ted Bundy. Let’s have me. And then we’re going to choose an image. So let’s click post an image.
And again, we can upload our own images or you can upload your own images from your computer, or you can search for existing images from our big library of stock images.
So let’s say, we’re going to go with This picture here, this chat and click done. So now we’ve got our image and the title and the postal author.
So let’s click start. Okay. So this is a subtitle for your new post, and then we’ve got an image and then we’ve got some texts.
So if we click on this Block here, we can just write out a new title to start a consulting business.
So we’ve now got a title. And if you want, you can highlight this and click bold, or you can underline it italicize.
It changed the color or the size. You can choose different font type. There are over 100 different Google fonts to choose from.
You can change the header type, whether it’s eight, one to six or paragraph text change, the weight, the alignment, and so on.
You can turn into a link, lots and lots of options for editing text. Hey, we can edit an image. We can get rid of the image, or you can start to write more content.
This is where you will learn about consulting. So this is how you start filling out your blog post and adding more content to the blog post.
The other thing that you might want to do is add additional features to the actual blog post itself. And so the way you do that is by coming over here to widgets, and you’ll see you’ve got this huge array of widgets that you can add to the actual blog posts.
So you can just hover over one of these widgets and hold down and drag and drop and pull it into place.
So for example, you might want to add a map, probably not the best place to add, add a map right at the top of a blog post.
But if you decide to do so, you can add a map. You can add your details here, and it’ll change the location on the map for wherever the location of the address that you put on here.
And that’s just the map as an example, but you can choose from lots and lots of different widgets. So we’ve got text images and icons image sliders.
You can add a custom code contact forms. There’s a basic section, countdown time as copyright articles, tables, you can add different types of media and videos, lots of different options for adding business information and scheduling information, social media content, and some additional advanced Options.
So Once you’ve built out your post and you’re happy with how it looks, then you can click on the publish post button and you’re good to go.
Step 5: Launch blog
You have a new post and we click on blog. Now we can see our new post has been added to the blog.
So there were three before, but now we’ve got a fourth blog post added. And if we head back to the homepage, we’ll see that the blog is added at the top here.
And you can continue to add content to and edit your blog post as before. So that is how to add a blog to a general digital website, build a website.
If you have any questions, get in tou
Responses